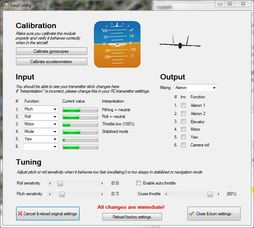
 This will guide you through the processes of configuring your Gluonpilot kit so that it is ready for your first flight. Downloading EverythingIf you have not assembled your gluonpilot module, please refer to the guide on how to do it here. If you have not already done so, you will need to download the drivers, configuration software and latest firmware for your module. Downloading FTDI Drivers If you are using windows 7 the drivers for the FTDI cable should be installed automatically, however if not they can be downloaded here. The easiet option is to download the setup executable, and just follow the instructions to install the drivers. 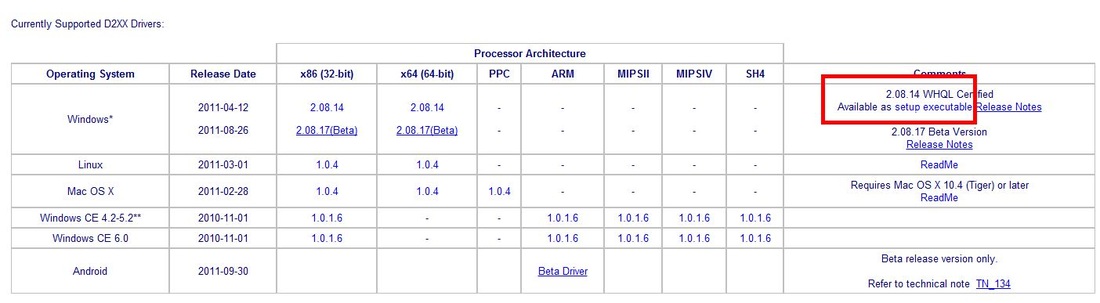 Download setup executable for the easiest ay to install the FTDI drivers Downloading Configuration Software, and GluonPilot Firmware To configure the module you should download the latest version of the GluonCS software (GluonCSInstaller), this software is used for your Ground Control Station, and used to configure your device, plan and monitor the progress your missions. Also you should download the latest version of the firmware (rtos_pilot). The files can be found here. Download the latest versions of the GluonCSInstaller.exe, and rtos_pilot.zip. A full list of all the files can be found here. 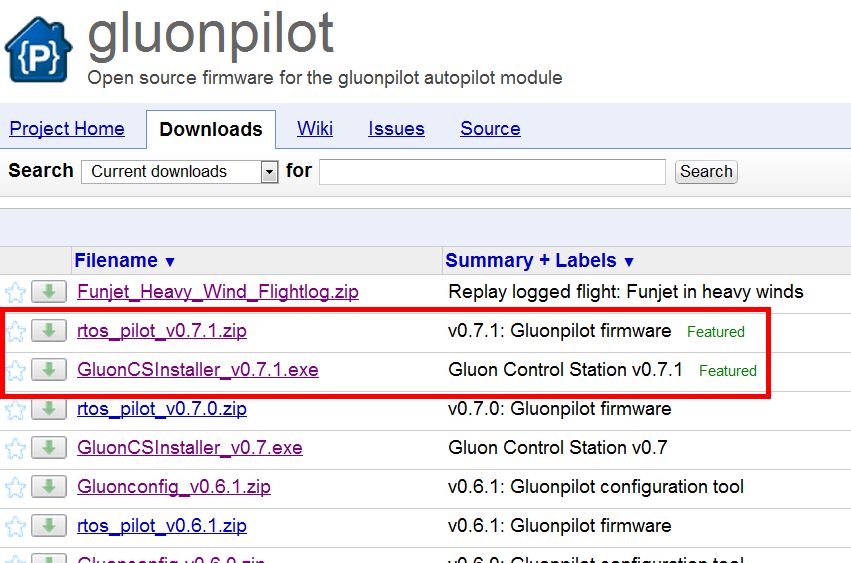 Open the CluonCSInstaller.exe and follow the onscreen instructions to install the software. Once it has been installed launch the application. .Net Framework You might need the latest .Net framework to run the GluonPilot software, download and install the latest version here Connecting to your GluonPilot Module with your PC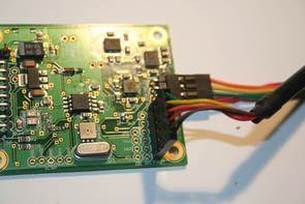 Plug your FTDI cable into your module with the black cable on the bottom of the board as shown. If the drivers have been installed correctly everything should work and no error messages will appear. 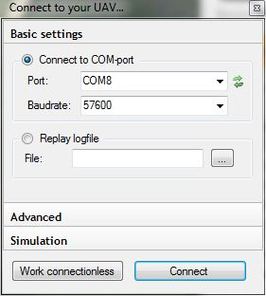 When you launch the GluonCS application, the first window you will see will ask you to connect to your device. You will need to select the COM port of your GluonPilot module (usually highest number COM port). Select the baud rate to be 57600 as shown in the image. If you cannot see your COM port click the refresh button to update the list of COM ports. Other options in this window allow you to replay a log file from a previous flight, or fly with a simulator (Flightgear). Configuring GluonPilot (Simple)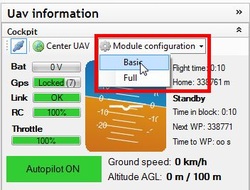 On the right side of the application click on the module configuration button and select the Basic option as shown in the image. This will open the basic module configuration page. You might notice that the artificial horizon is not exactly lever, this is because you need to calibrate the sensors.  Basic GluonPilot Configuration Page 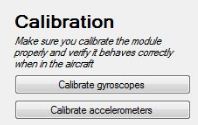 The first thing to do is to make sure your module is level, and not moving, then click on the Calibrate Gyroscopes, and Calibrate accelerometers buttoms, to calibrate the sensors. You will notice that the artificial horizon will slowly drift towards the level position. 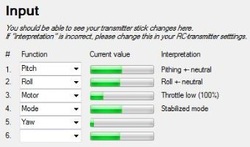 Now you will need to setup your RC channels. Move a stick on your transmitter and the corresponding bar will move on the application. You will need to assign the correct function to each channel. 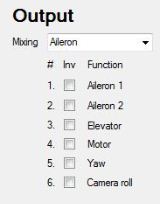 If you need to reverse a channel, or use mixing if you are flying a delta wing or a flying wing aircraft you can select the appropriate mixing option from the drop-down box., simply check the channels you wish to reverse.  The tuning options should be left as they are for your first flight, however after your first few flights you might notice that when you are in stabilised, or Auto modes that your aircraft oscillates fast, or is unresponsive, you will need to adjust the parameters. If your UAV is oscillating fast, you will need to reduce the sensitivity values, and of it is unresponsive, you will will need to increase the sensitivity. You will need to play around with these values until you find the best settings. Write settings to your module  Finally you will need to click the close and burn settings button to write the configuration parameters to your GluonPilot module. If you have made a mistake you can either reload the factory settings, or just cancel by selecting the appropriate button. Thats it, you are ready to flyNow that your module is configured you can install it into your aircraft and test it out in the air. It is reccomended that you first fly with the module in manual mode to verify everything is connected and working correctly. More information about your first few flights will be covered in another tutorial.
Comments
|
 RSS Feed
|
|
Visit our Community Forums if you have any questions
|