UNMANNED TECH
  • Home
  • Shop
  • Students/Researchers
  • About

All IN One Pro Board Setup with MegaPirates COde

18/12/2013

Comments

 
All In one Pro v2 board
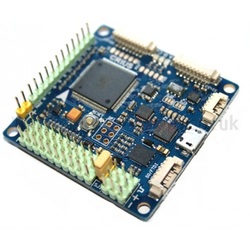
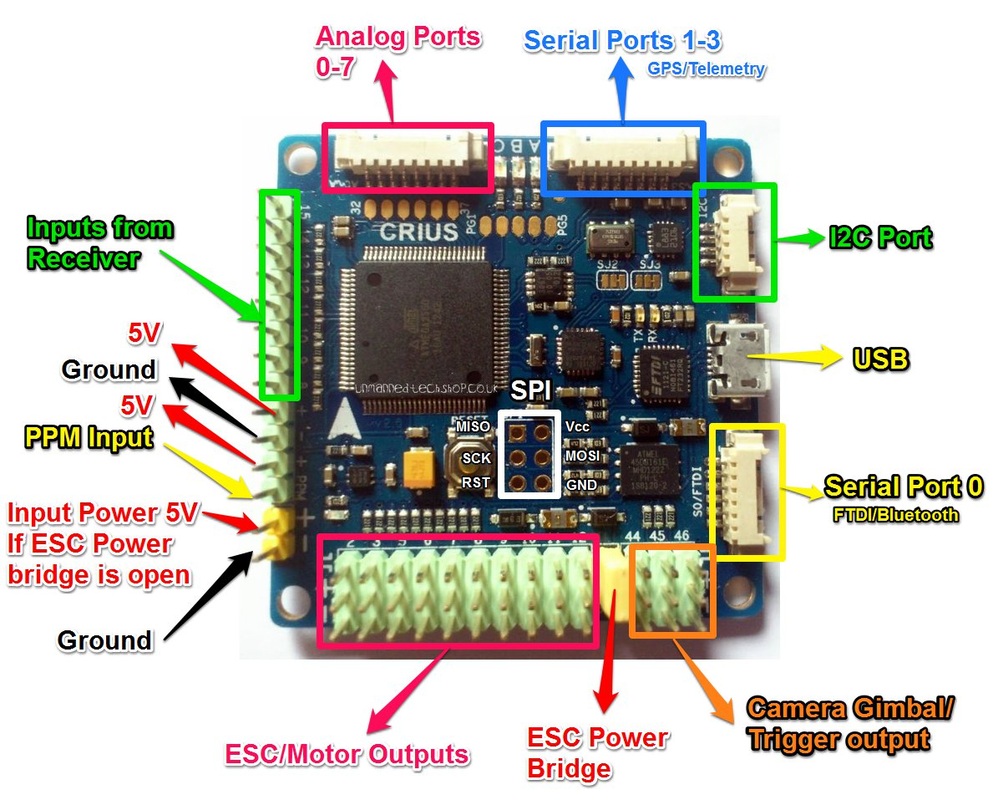
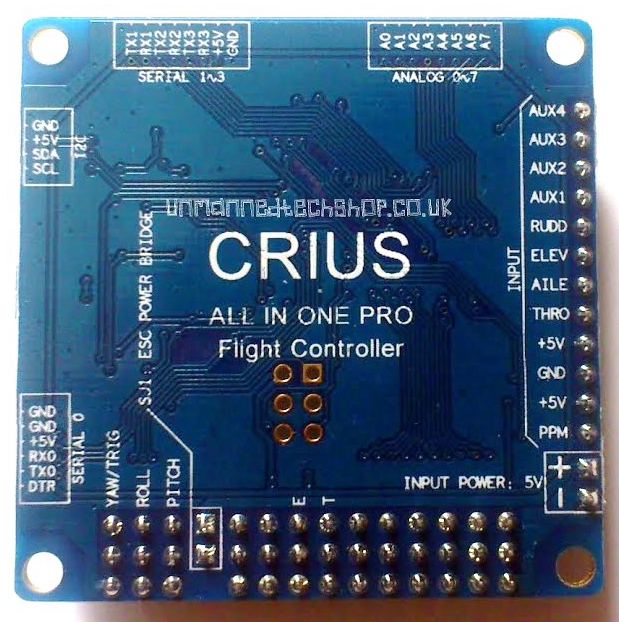
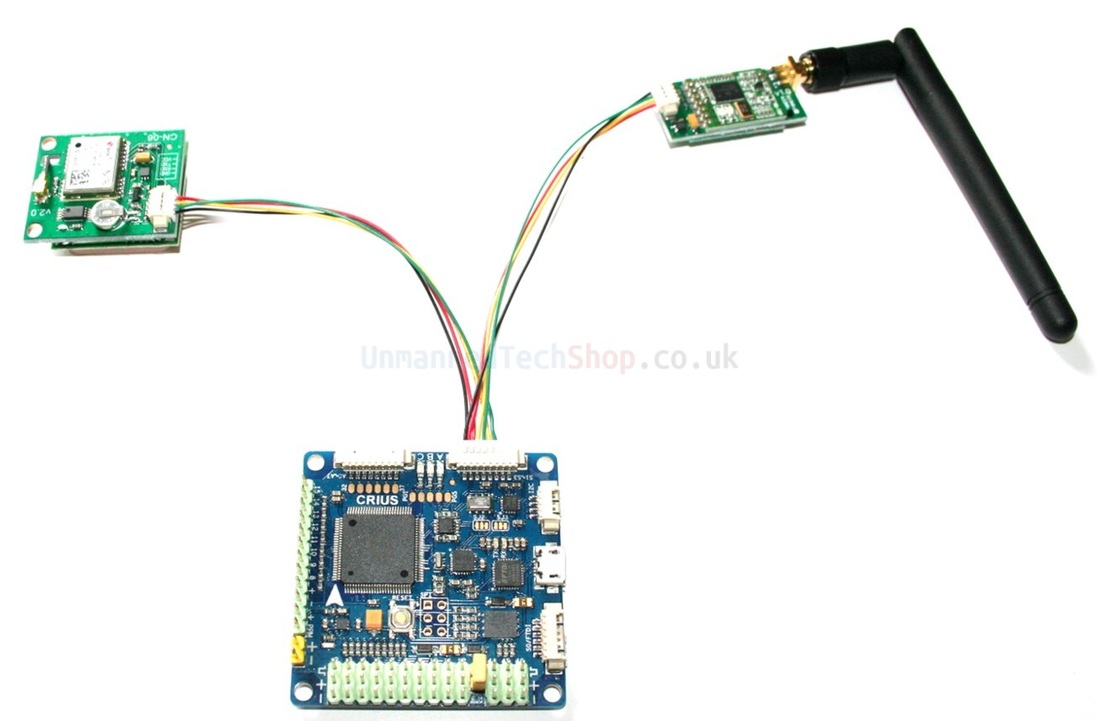
The MegaPirates NG Code focuses on porting the Arducopter code over to various other controller boards, including the All in one Pro board that we sell.

This guide will show you how to configure and setup your AIOP board to work with the MegaPirates NG code.  The nice thing with the MegaPirates code is that it can be used with the ArduPilot Mission Planner - A graphical user interface for your autopilot

The AIOP board can also run multiwii code if you want.

Buy AIOP Board

All in One Pro Board Layout

All in one pro layout v2
All in one pro V2 Top Layout - click for larger image
Picture
All In One Pro v2 Bottom View

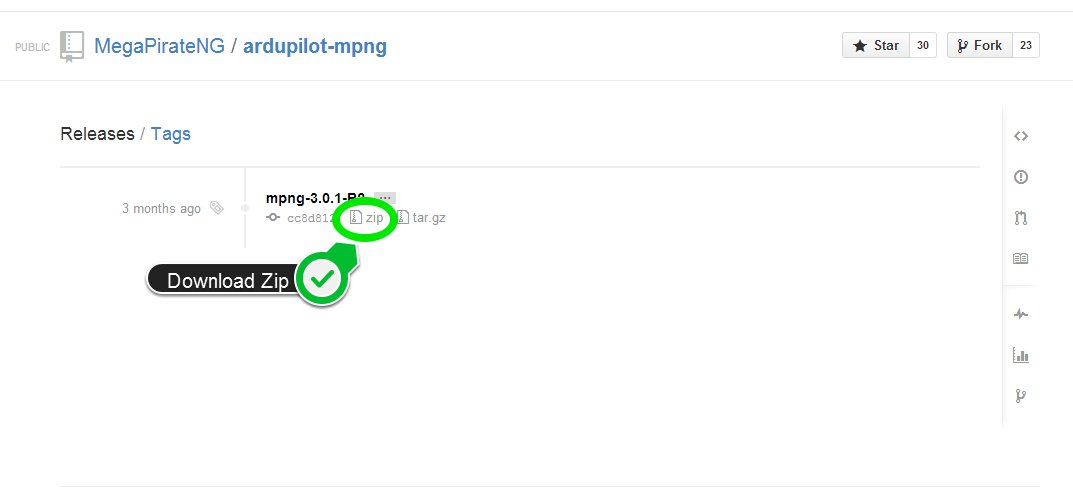
Getting the MegaPirates Software/Tools

Picture
  • Download the latest version of the MegaPirates NG code from GitHub here
  • The newest version will be on the top
Picture
  • The Arduino software is used to configure and compile the MegaPirateNG Code and upload it to your Crius AIOP Board.  You can download it from here 
  • Create a directory on your PC called Crius  (on your desktop will be fine)
  • Inside the Crius directory create two more directories, Arduino and MegaPirate
  • Unzip the MegaPirateNG files into the MegaPirate Directory you created
  • Unzip the Arduino files into the Arduino Directory you created.
  • Now open the MegaPirate Folder and copy the Libraries folder to the Arduino  Folder (you will be prompted and asked if you wanted to merge the two directories and overwrite any files etc).
  • Open the Arduino Application inside the arduino folder (arduino.exe)

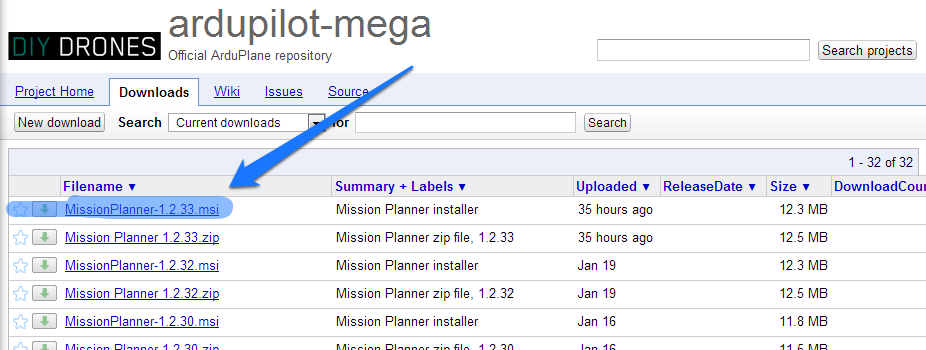
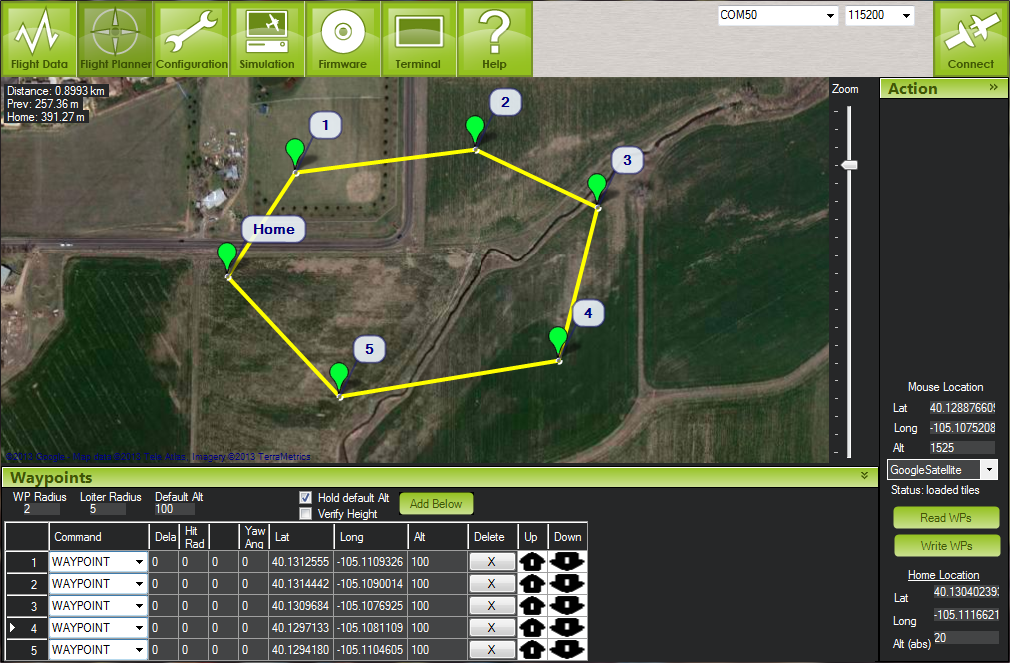
ArduPilot Mega Mission Planner Software
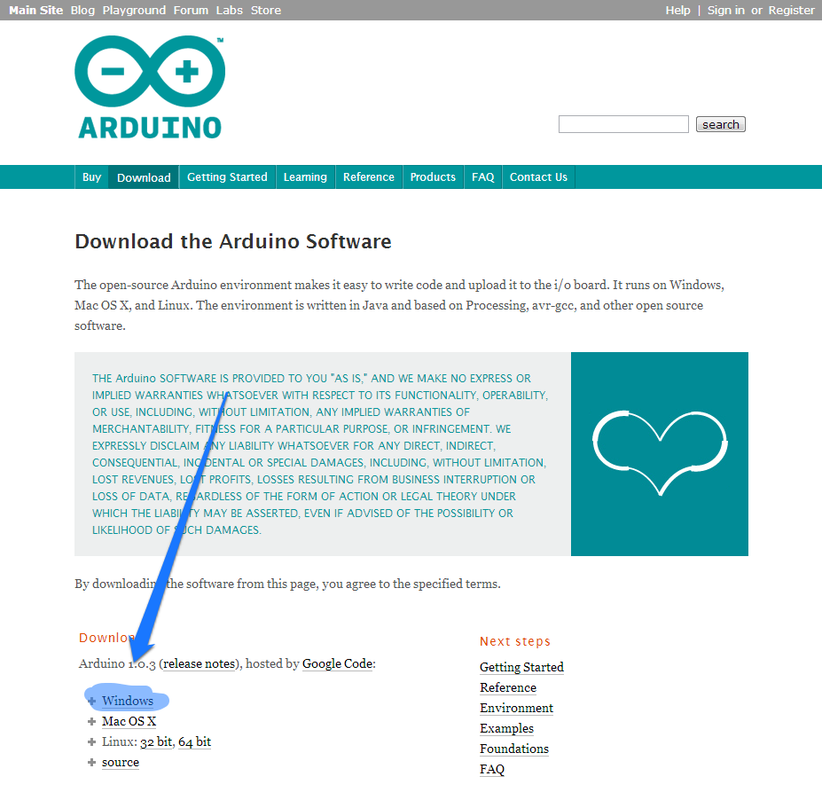
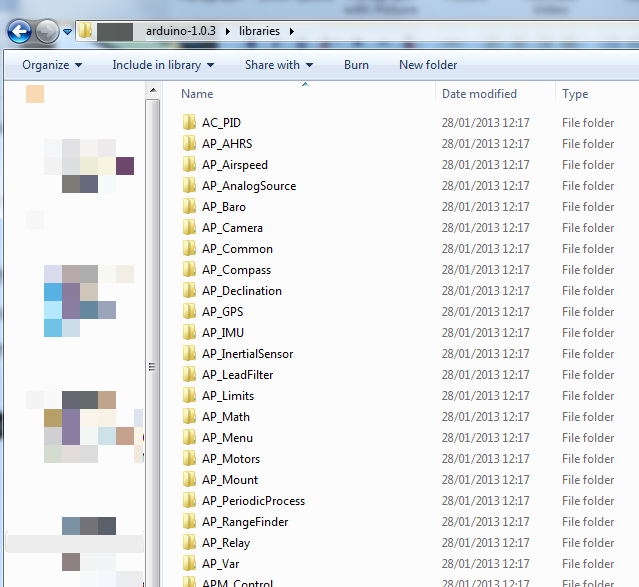
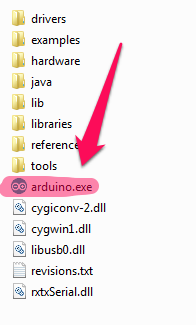
Picture
Picture
  • APM Planner was written for APM and as such not all features work on the Crius AIO with  MegaPirateNG. For example you cannot upload firmware using this tool.  The APM Planner is used for configuring and calibrating your AIOP board
  • You will need to download the APM Planner software from here
  • For more details on the features of this software go to the wiki here

Setting Up Arduino

Picture
  • First Plug in your AIOP board, windows 7 should automaticaly load the correct drivers.
  • Under tools check that its is configured for the correct board, for the Crius is should be Arduino Mega 2560 or Mega ADk as shown
  • Now select the serial port the Crius AIO. This is done in Tools>Serial Port in the menu.   It is usualy the biggest COM port number

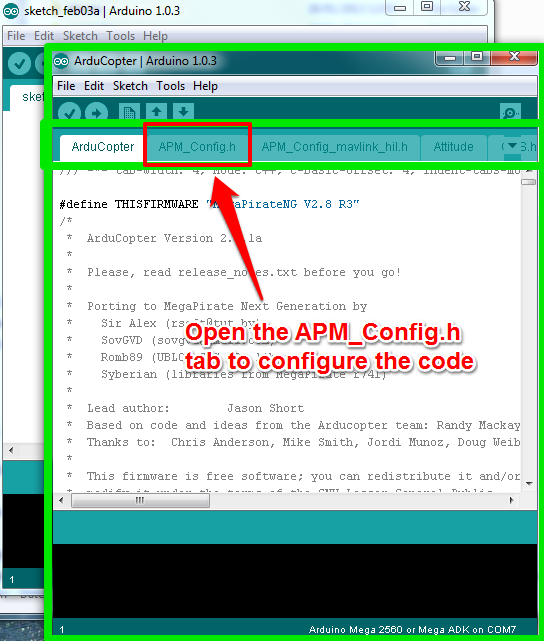
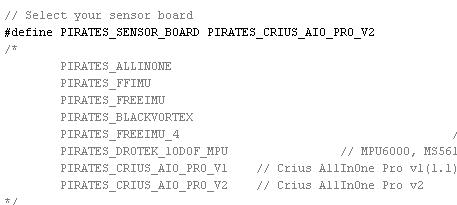
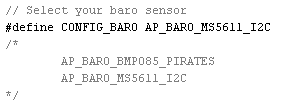
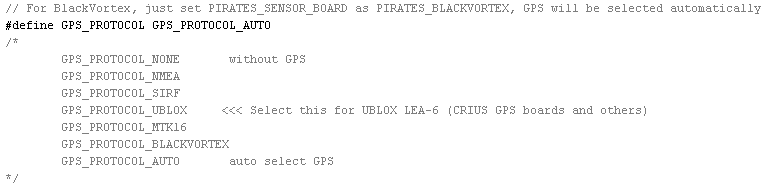
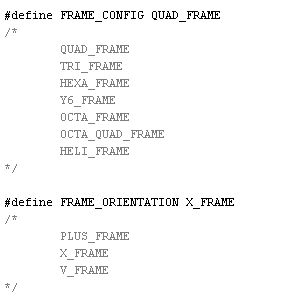
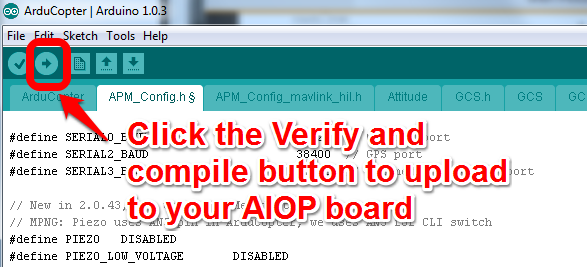
CONFIGURING and Uploading the MegaPirate Code

Picture
  • Use File > Open in Arduino and navigate to the Megapirate folder your created, open the sub folder called ArduCopter. Inside this folder there is a file called ArduCopter.pde. open this file.
Picture
  • A new window will open showing the megapirate code.
  • You will notice that there are tab's along the top the only one that we have to make changes to is the APM_Config.h and as you can see buy the picture above that this is the second tab  along just click on this to edit it.

Picture
Picture
  • Browse through the code to change the following sections
  • First one is the Board Type, it should be changed to: 
    #define PIRATES_SENSOR_BOARD PIRATES_CRIUS_AIO_PRO_V2 
  • Change the Baro to
    #define CONFIG_BARO AP_BARO_MS5611_I2C 
Picture
  • Change the GPS Protocol to
    #define GPS_PROTOCOL GPS_PROTOCOL_AUTO
  • If you are using the Extend board, you should change this to UBLOX.
  • If you find that the AUTO detection is not working, you may need to choose a specific option.
Picture
  • Change the Frame type depending on your multicopter configuration
    #define FRAME_CONFIG QUAD_FRAME
  • You will also need to set your frame orientation
    #define FRAME_ORIENTATION X_FRAME
Picture
  • Click the Verify and Upload button on the toolbar to compile and load the code onto your AIOP board.
  • You should not get any errors, if you do go back to the beginning and start again. It is known to get errors if you have not copied the libraries folder from MegaPirate into the Arduino folder…… so if in doubt redo it. 
  • Once you have successfully compiled and uploaded MegaPirateNG to your Crius Board you can now move onto installing APM Planner, checking the board and setting up your radio and calibration etc. 
  • If you are using extra hardware like a telemetry kit, you will need to change some other settings (see below)

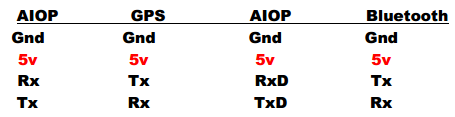
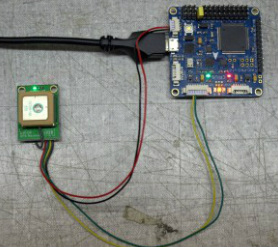
AIOP Megapirates Status LEDS
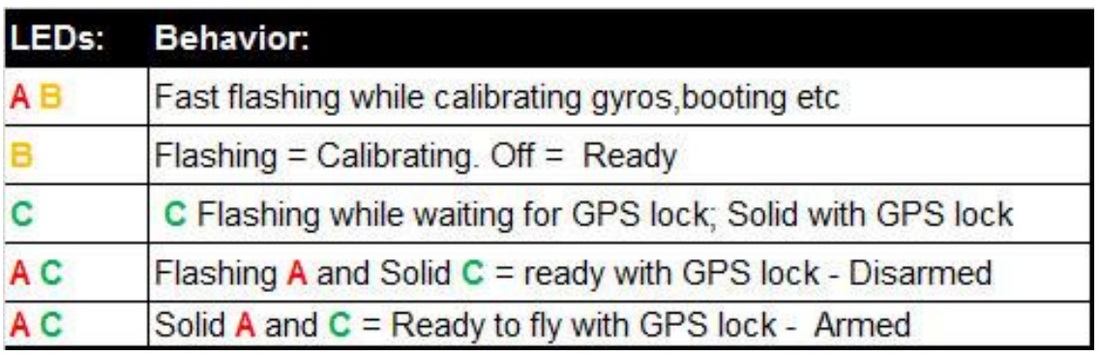
Picture

Connecting your GPS module

Picture
Picture Credit - Gaza07 @multi-rotor.co.uk
Picture
  • An easier way to connect your AIOP GPS module and Telemetry module is with a special harness that we sell, so you dont need to cut/solder any wires.
Buy AIOP Harness
Picture
Picture
Picture Credit - fpvcentral.net
  • Almost any serial GPS module can be used with the AIOP board.  However we suggest you use the Ublox NEO 6M GPS module.
  • You can also use the Ublox LEA 6H GPS module
  • The GPS needs to be connected to the RX2 and TX2 ports on the Crius AIO controller.
  • At the same time, 5V power has to be supplied as well, but the serial ports 1, 2 and 3 on that connector don’t offer Vcc (they can if you power the board externally and remove the yellow jumper, but that’s for another tutorial) – so the easiest way is to just use the 5V and GND pins of the I2C port.
  • This is simple because Crius was so nice to supply all the molex connectors needed with the board – all you have to do is switch around the pins a bit.

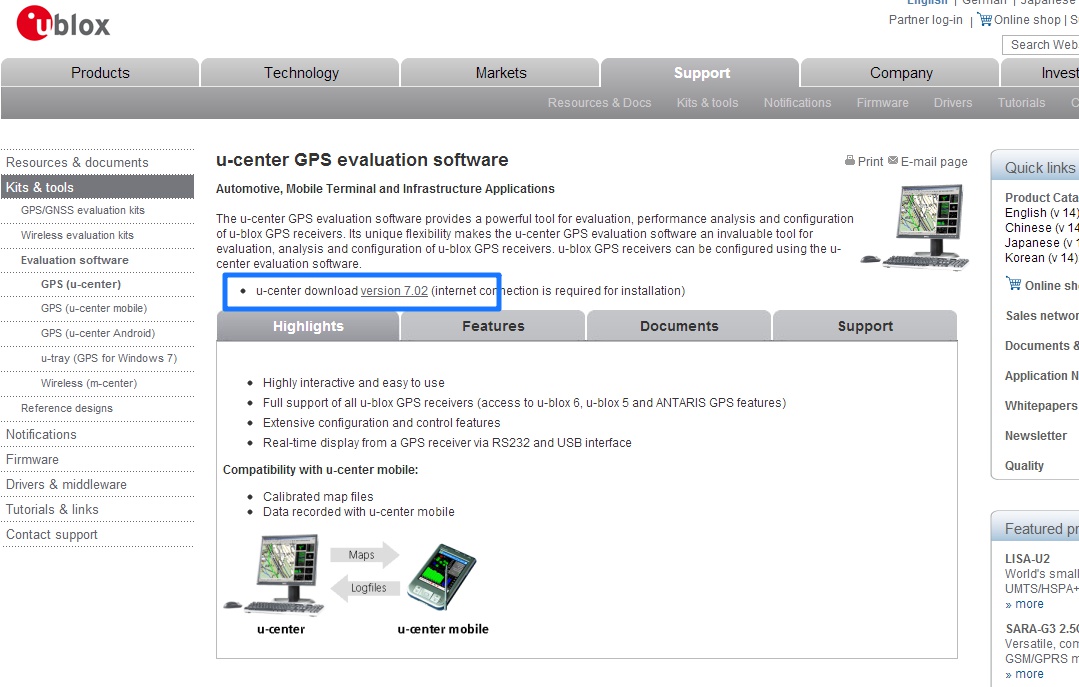
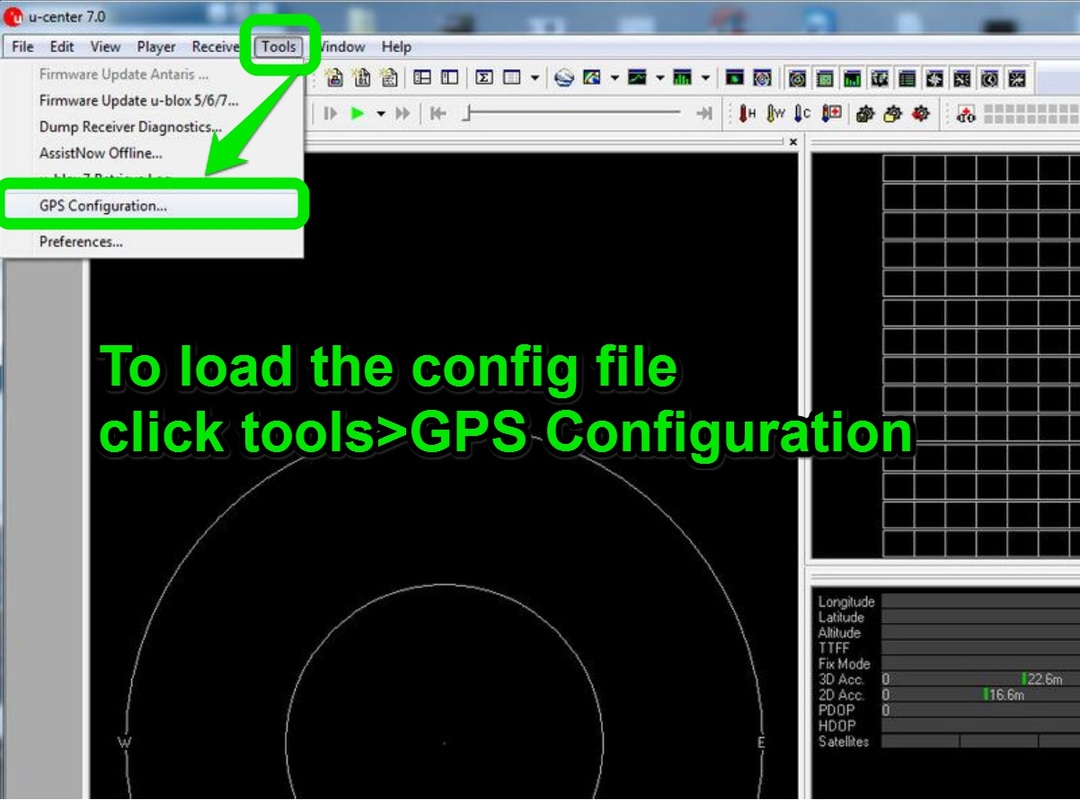
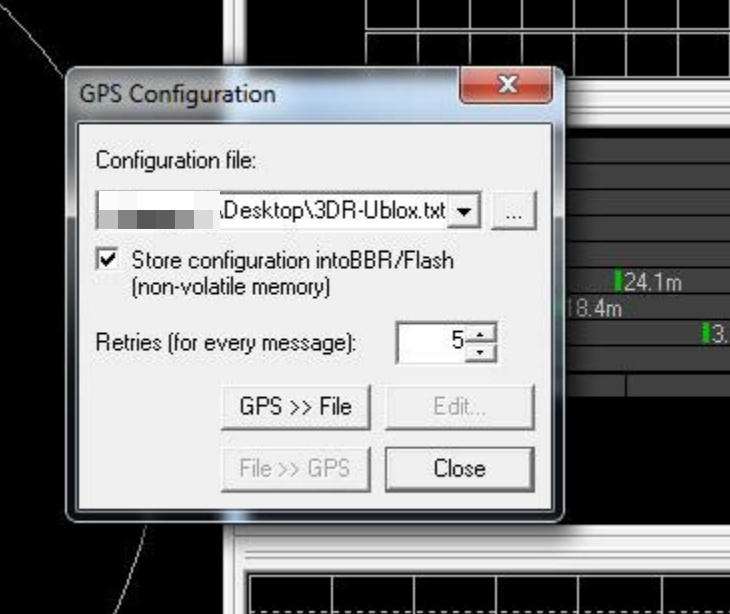
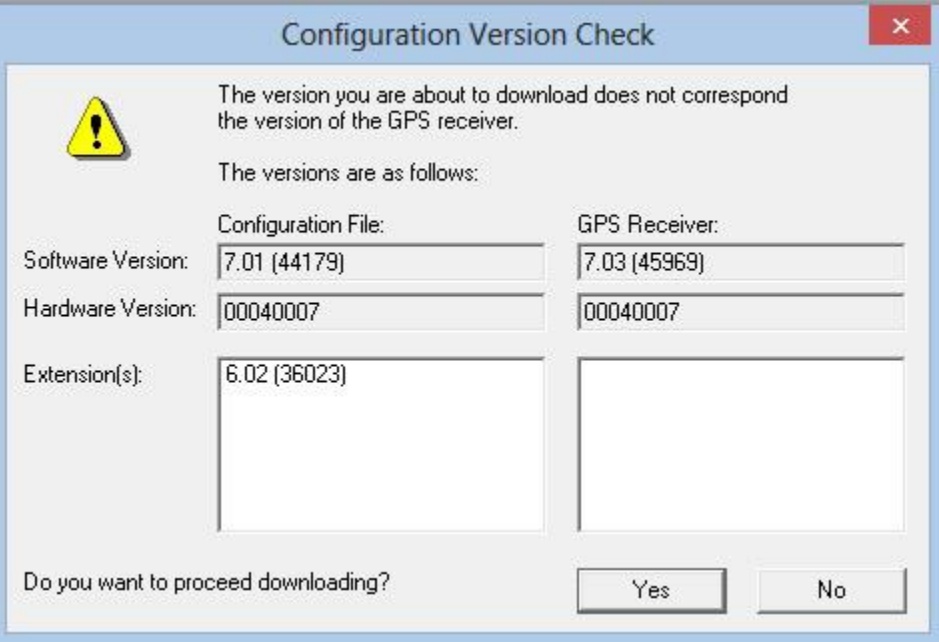
Configuring your GPS Module - Optional
(Ublox NEo/LEA units) - 

Picture
  • There is a config file that you can use with pre-defined settings for use with the ardupirates code.
  • You will first need to download and install U-center to confugre your Ublox module - Download Here
  • You will also need to download the config file Here - (right clock and save as)
  • Now you will need to connect your GPS module to your computer via USB/FTDI depending on your GPS module.
  • Once connected open U-Center
Picture
  • To load the GPS config file click on the Tools>GPS Configuration menu as shown
Picture
  • A window will open asking you to choose a config file
  • Open the config file you downloaded before and send the file to the GPS module 
Picture
  • You might get an error if you are using a NEO GPS module, but this can be ignored.
  • Click on Yes to continue.
  • You might get a couple of errors, but once it it complete the important settings will be saved onto the GPS module.  You should now be able to connect to it via U-Center at the baud rate of 38400.
  • You have now configured the module with optimum settings for the ArduPirate code
If you have any questions about setting up your All in one pro board, or any other general multirotor questions be sure to visit our forums to talk to other members!
Visit community forums
Comments
comments powered by Disqus

    Categories

    All
    Camera
    ESC
    Flight Controller
    Fpv Gear
    Gimbals
    Gluonpilot
    Multirotor
    Radio Control
    Telemetry

    RSS Feed

    Forums
    Buy Stuff
    Knowledge Base
Picture
Visit our Community Forums if you have any questions
  • Home
  • Shop
  • Students/Researchers
  • About