UNMANNED TECH
  • Home
  • Shop
  • Students/Researchers
  • About

Q800 Hexacopter Frame Assembly Guide

15/11/2012

Comments

 
Picture
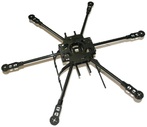
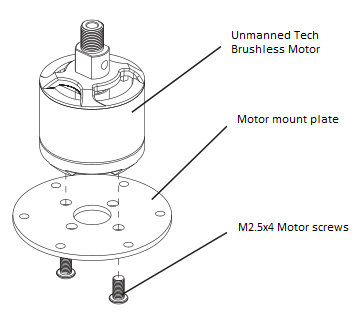
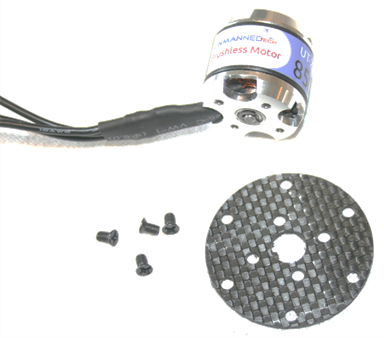
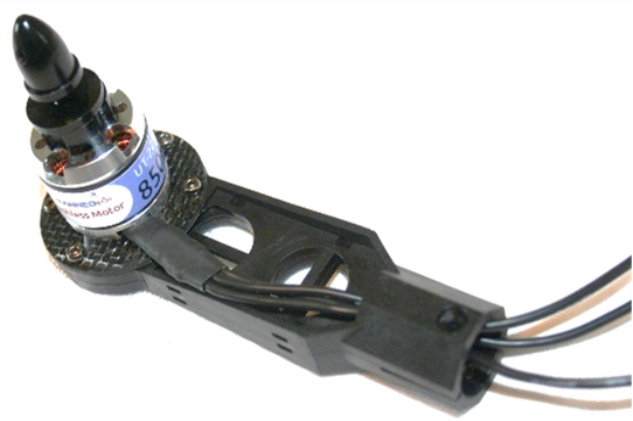
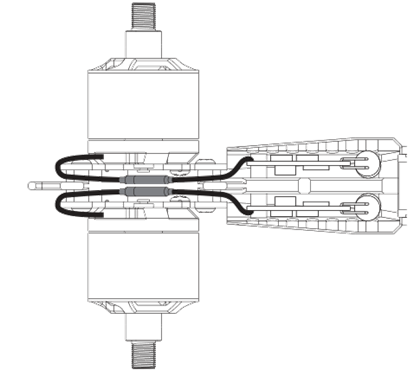
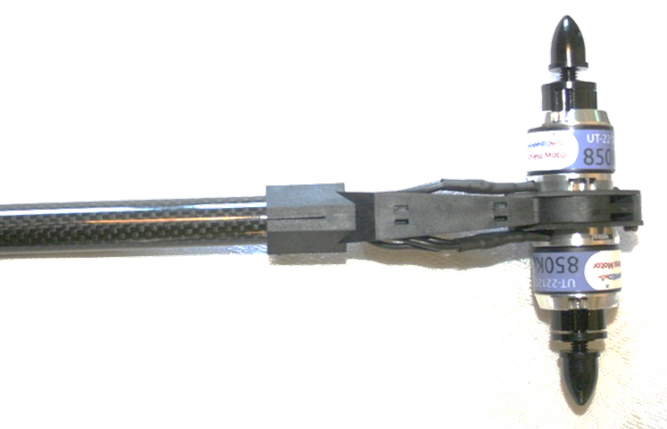
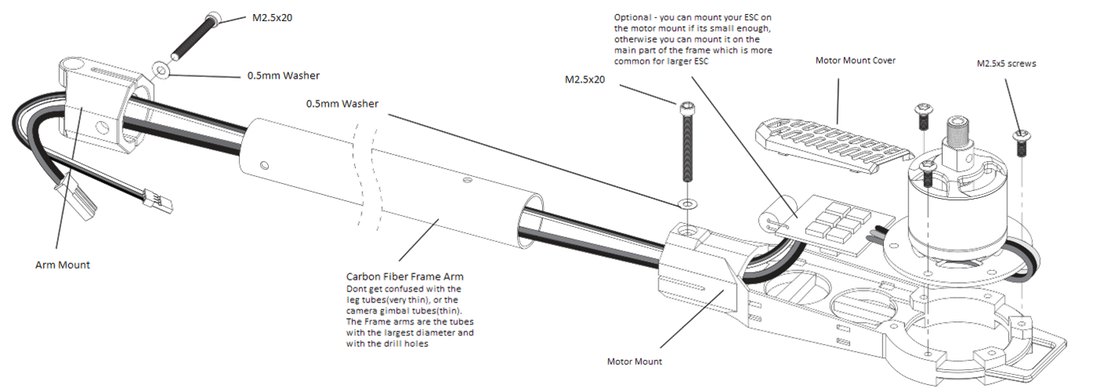
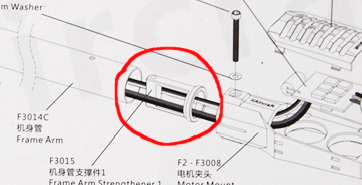
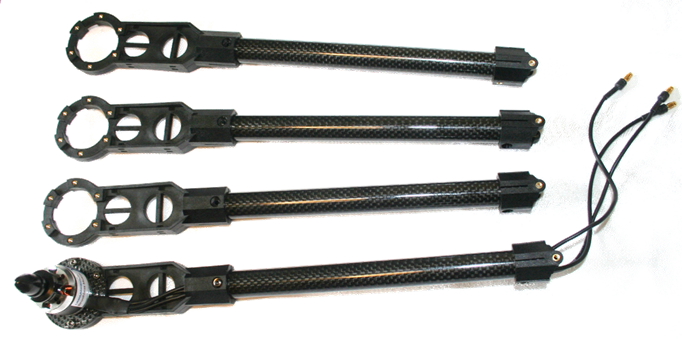
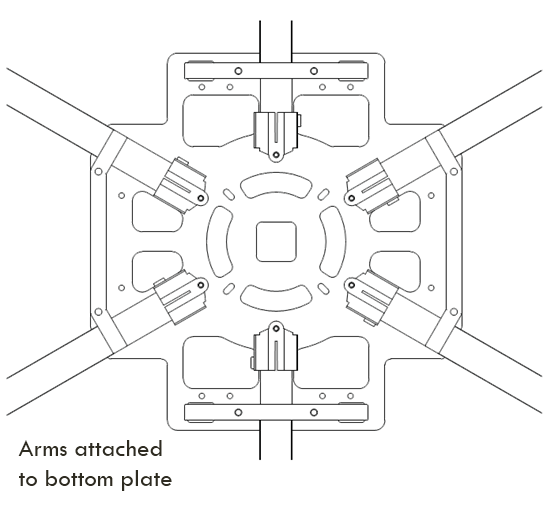
The Q800 hexacopter frame is based on Q650 quadcopter frame there are many shared components between these two frames. This is a high quality carbon fiber hexacopter frame, designed to be large enough to use larger propellers. The arms can fold down for easy storage and transportation. Just like the Q650 frame this frame also inlcudes vibration dampers to reduce vibrations on your videos/photos should you decide to attach a camera gimbal.

Important Safety Notes

Please make sure you read our Multicopter Safety Notes page as it has some important tips to keep you and people around you safe when flying your multicopter.

About your Q800 Hexacopter Frame

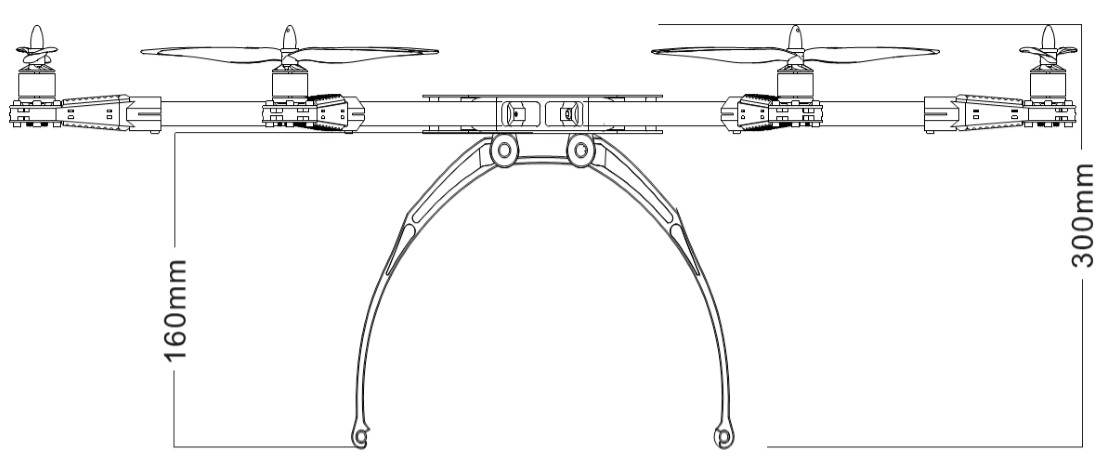
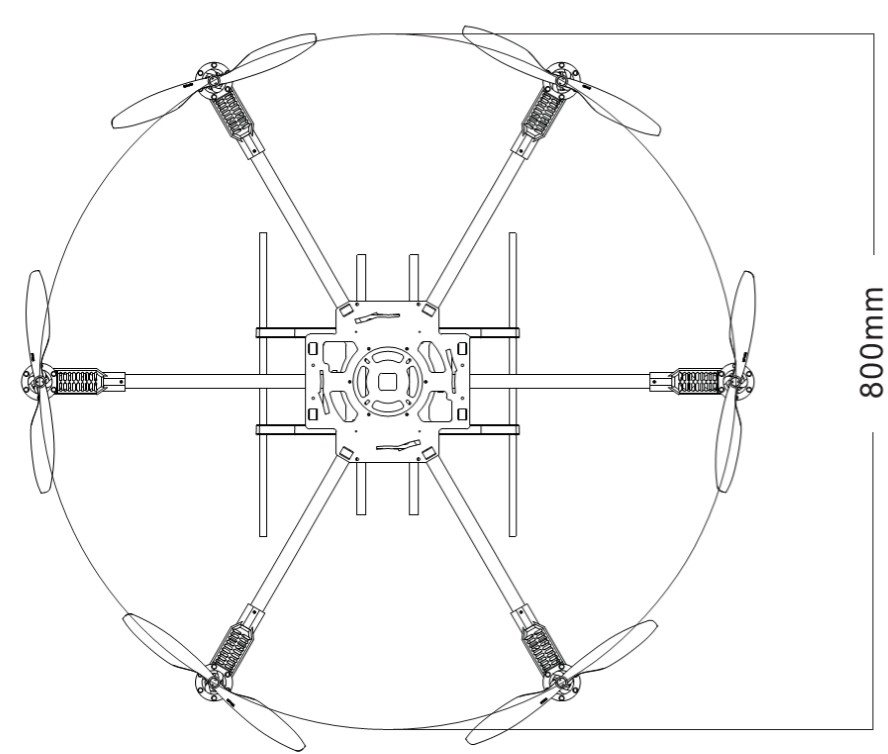
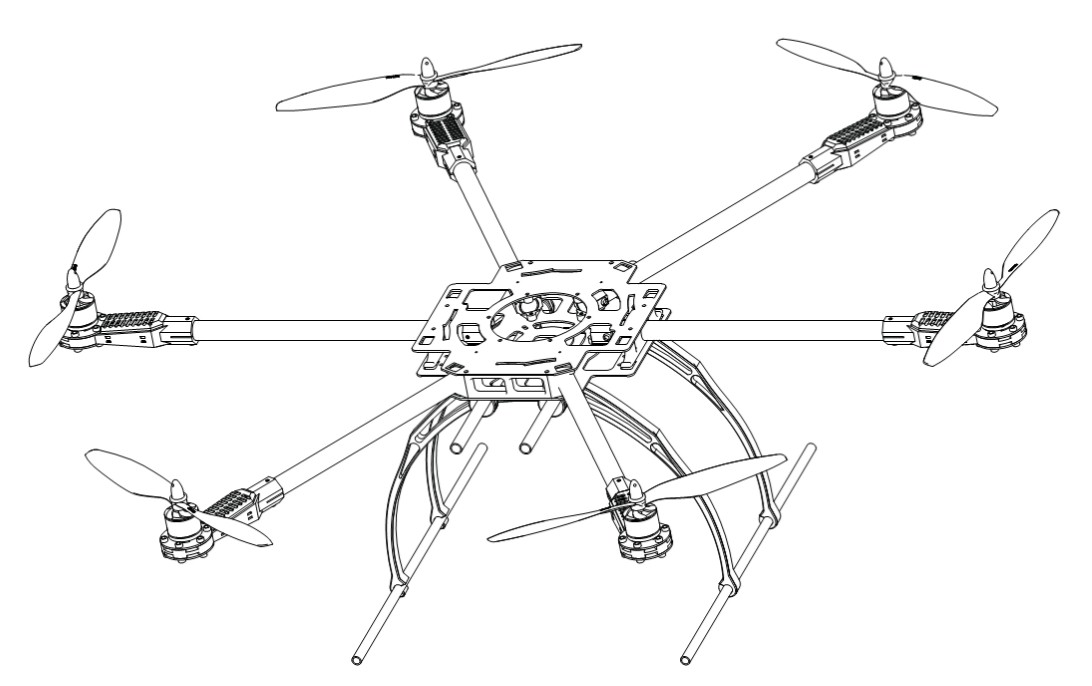
The Q800 is a 800mm diameter hexacopter.  It is made from carbon-fiber materials that is very strong and light.  The frame has been designed for Aerial Photography and can easily fold down within seconds for easy storage and transportation.

This frame is similar to the Q650 quadcopter and shares some common spare parts and accessories like camera gimbals.  The loading tube system is the same on both models which feature silicone vibration dampers to give you a stable and smooth camera platform.

Arm Assembly
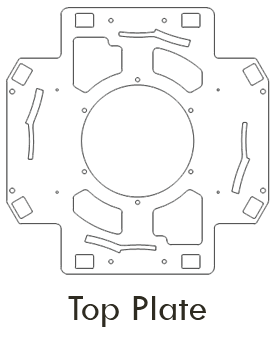
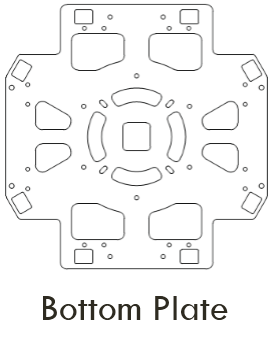
Picture
  • The first step is to mount your motors onto the motor mount plates.  You do this using 4 of the M2.5 screws included with the frame.

Picture
  • Once the motors are attached to the mount plates, you will then screw them onto the plastic motor mounts.
Optional X8 Configuration
If you are building this frame to be an X8 quad (to lift heavier payloads), then you will just attach a motor on both the top and bottom of the motor mount.  More details are on the next page.
Picture
click for full view of the arm assembly
  • Assemble the arms of your frame as shown.  You will need to do this 4 times for each arm of your hexacopter.
Picture
Important
The parts shown are included in the diagram above, but you need to insert them into the end of each tube.  This is used to prevent the tubes from crushing when you tighten the screws.
Picture
Picture
Picture
  • A picture of the completed arms are shown, you will need to do this for all 6 arms

Frame Assembly

Picture
Central Frame Assembly - click for full view
  • Now that the arms are assembled, you will need to build the central part of the frame.  An overview of how the central part is assembled is shown.
  • Please take note of the upper and lower plates of the central assembly as well as the orientation.
  • Make sure you fit the gimbal tube holders (shown in Lander Gear Assembly)  before assembling the top and bottom plates otherwise it is impossible to get at the mounting screws!

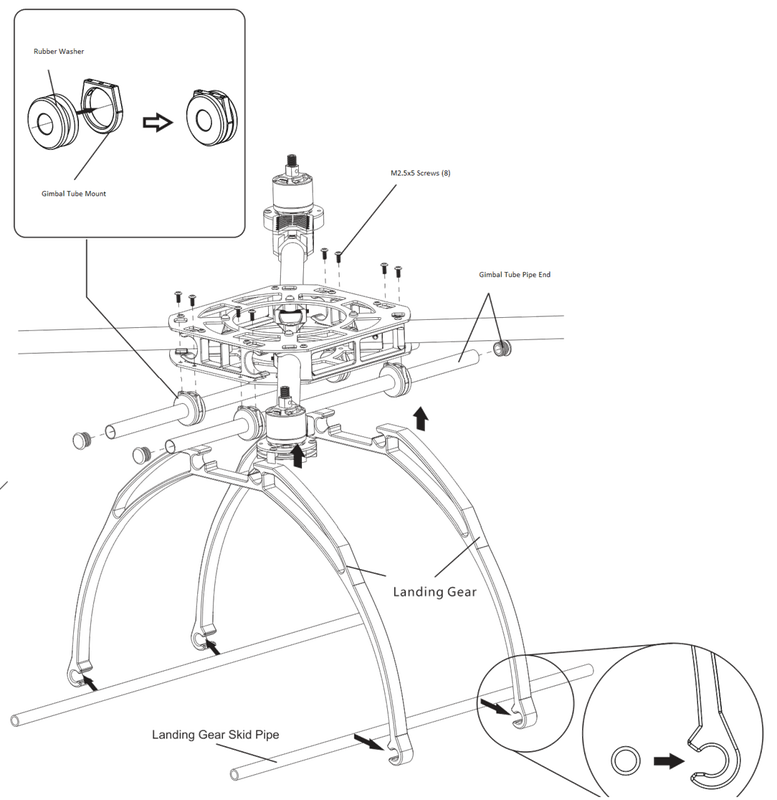
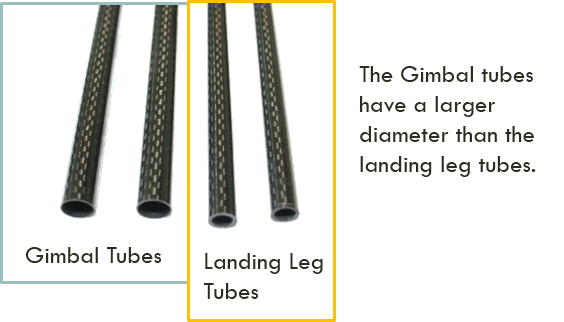
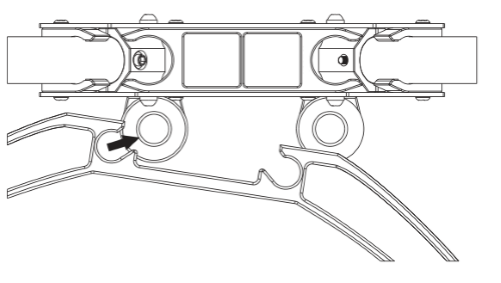
Landing Gear Assembly

Picture
Picture
  • First attach the landing leg tubes onto the landing gear.  
  • Once that is done you will then need to mount the gimbal tubes onto your frame using the gimbal tube mounts and rubber washers as shown.
Picture
Picture
  • After the tubes have been attached to the frame, you must clip the legs onto the gimbal tube.  This requires some force, but be careful not to break the landing gear when doing so.

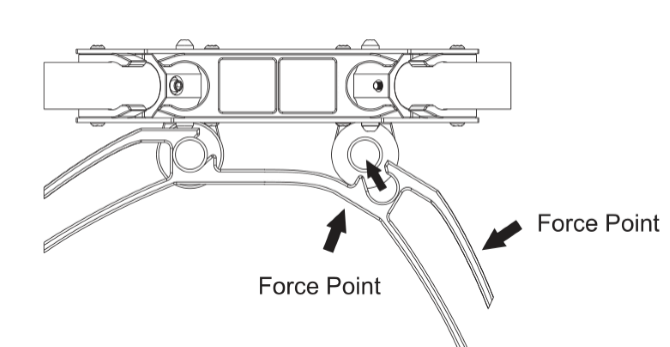
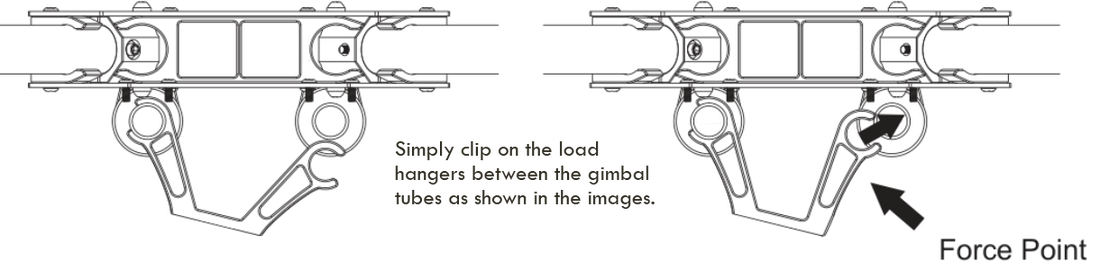
Mounting a Gimbal to your X800 Hexacopter Frame
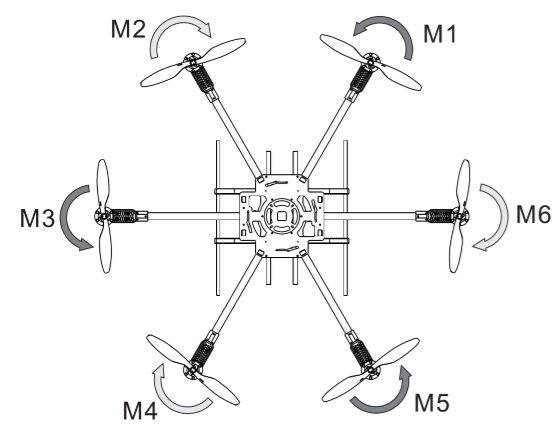
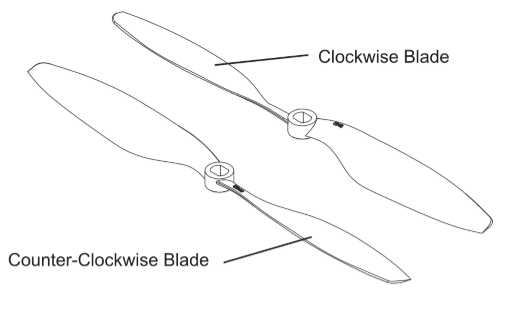
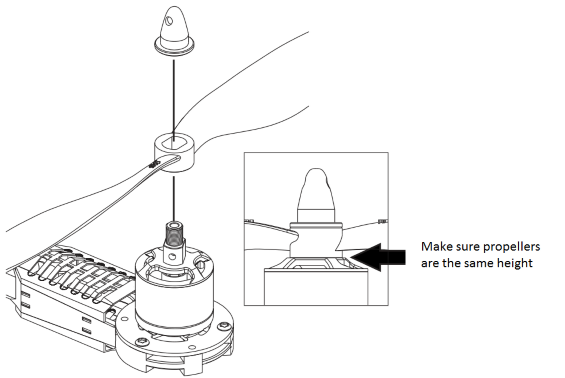
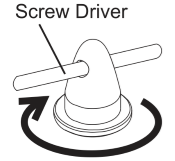
Picture
  • You will receive two loading hangers with your frame that allow you to attach a gimbal. 
  • The gimbal tube is attached to the frame via rubber washers to reduce vibrations that cause blurry videos.  
  • For the best performance you should also make sure that your propellers are balanced to further reduce vibrations.  
Picture
  • The Gimbal Mount plate is attached to the load hangers using the M2.5 screws as shown below.
Picture
  • Here you can see the frame with the load hanger with the load hanger attached below.

Propeller Assembly

Picture
  • Your hexacopter frame uses counter rotating propellers.  The orientation and spinning direction of your motors are dependent on your flight controller.
  • Note: If testing the prop direction please be careful not to hurt yourself
Picture
Picture
  • As shown there are two types of propellers, a clockwise rotating propeller and a counter clockwise propeller.
  • To attach the propellers to the motors please see the images to the left/  You will need to loosen the prop nut, slide the propeller onto the motor shaft and tighten it again.
Picture
  • Use a screwdriver to tighten the prop holder to secure the propeller
Picture
  • If you find that a motor is spinning in the wrong direction, you simply need to switch an ESC connection cable as shown.
  • More instructions for configuration should be found with your flight controller documentation
If you have any questions please ask them below
Comments
comments powered by Disqus

    Categories

    All
    Camera
    ESC
    Flight Controller
    Fpv Gear
    Gimbals
    Gluonpilot
    Multirotor
    Radio Control
    Telemetry

    RSS Feed

    Forums
    Buy Stuff
    Knowledge Base
Picture
Visit our Community Forums if you have any questions
  • Home
  • Shop
  • Students/Researchers
  • About