UNMANNED TECH
  • Home
  • Shop
  • Students/Researchers
  • About

FY-G3 GoPro Brushless Gimbal Manual

7/11/2013

Comments

 
Picture
The FY-G3 Brushless gimbal is a ultra fast and smooth gimbal that you can use with your GoPro 3 camera to provide ultra smooth videos.  This brushless gimbal comes 90% assembled and is preconfigured to use with your gopro camera, so you don't need to do any tuning.
Buy FY-G3 Brushless Gimbal

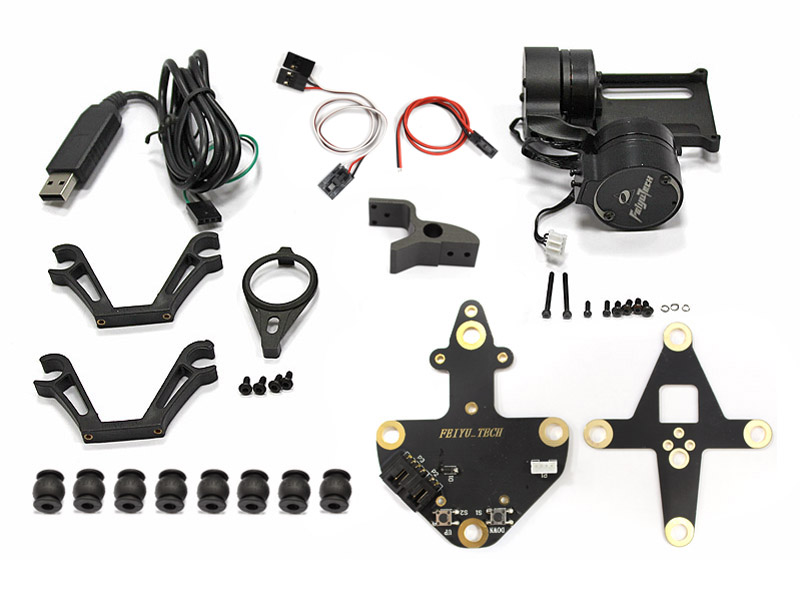
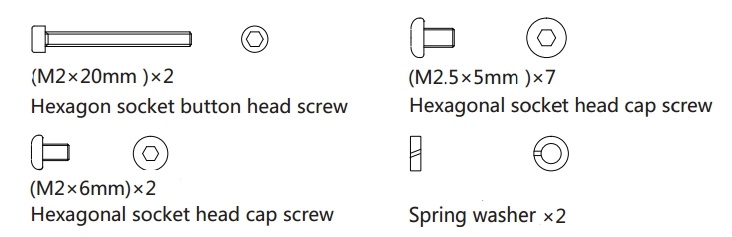
Parts Included with Gimbal

Picture
FY-G3 Phantom Version Parts
  • The FY-G3 brushless gimbal was originally released as the standard version and has now been replaced by the phantom version.
  • The gimbal is still the same for both, but the phantom version has phantom compatible mounting plates and is slightly shorter to fit underneath the phantom quadcopter.

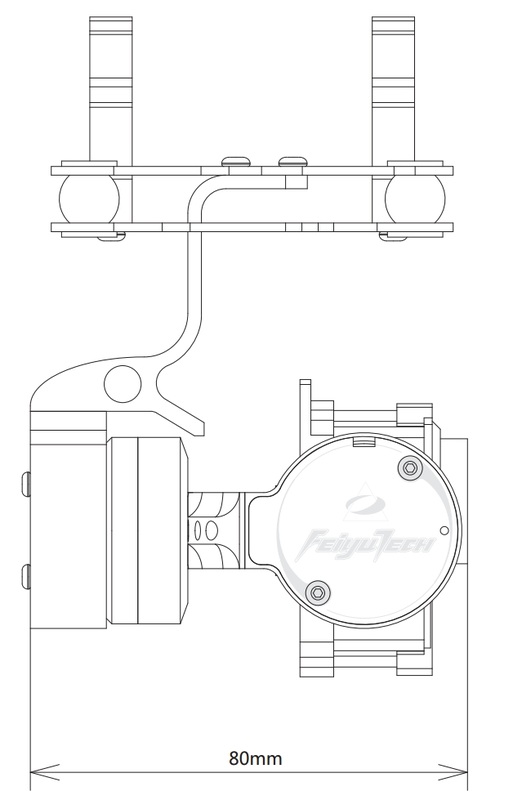
FY-G3 Dimentions - Standard Version

Brushless gimbal front view
Front View
Picture
Side View

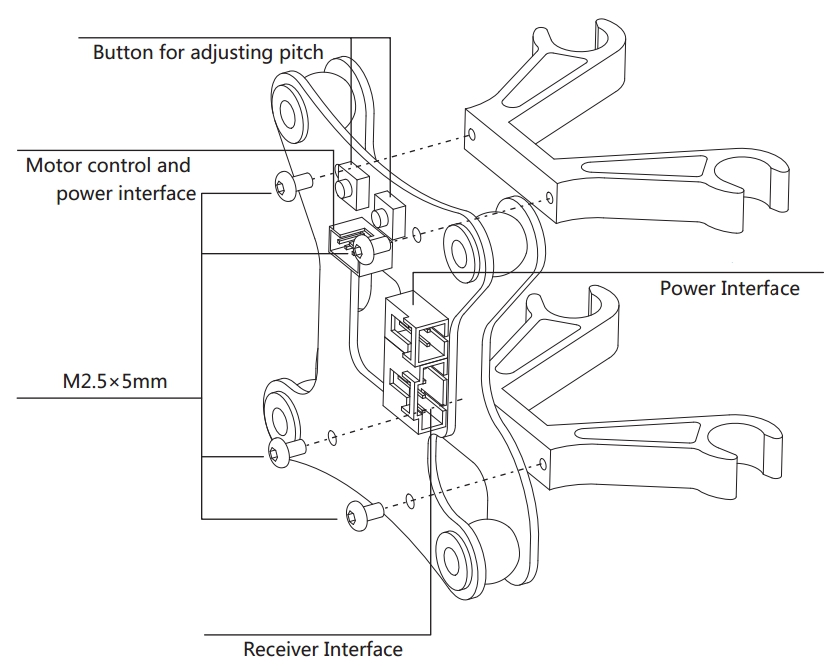
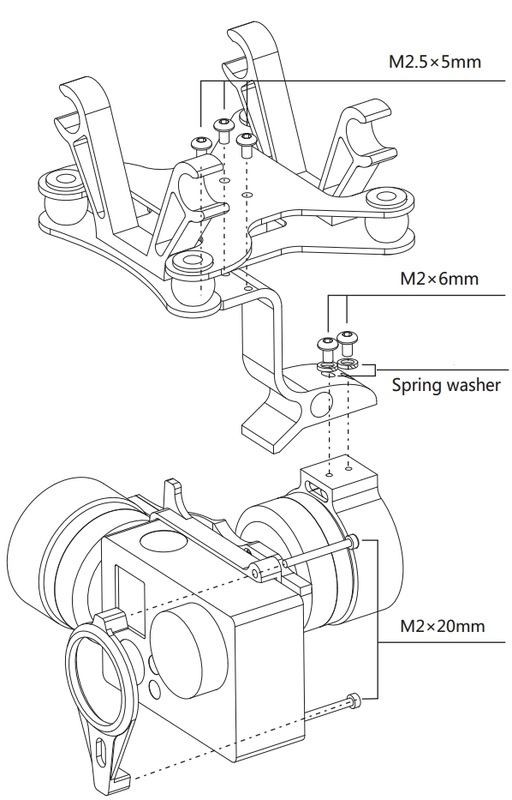
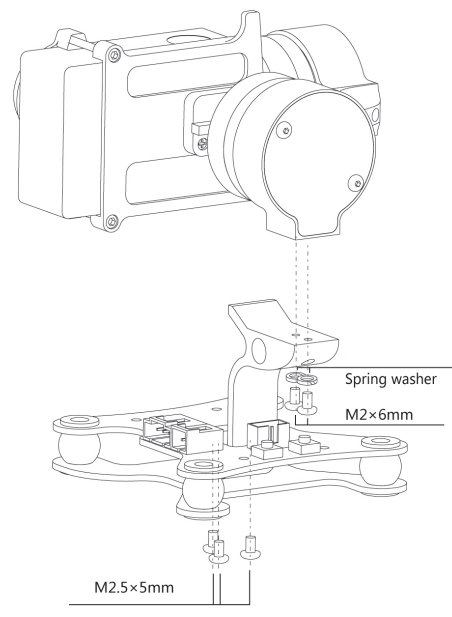
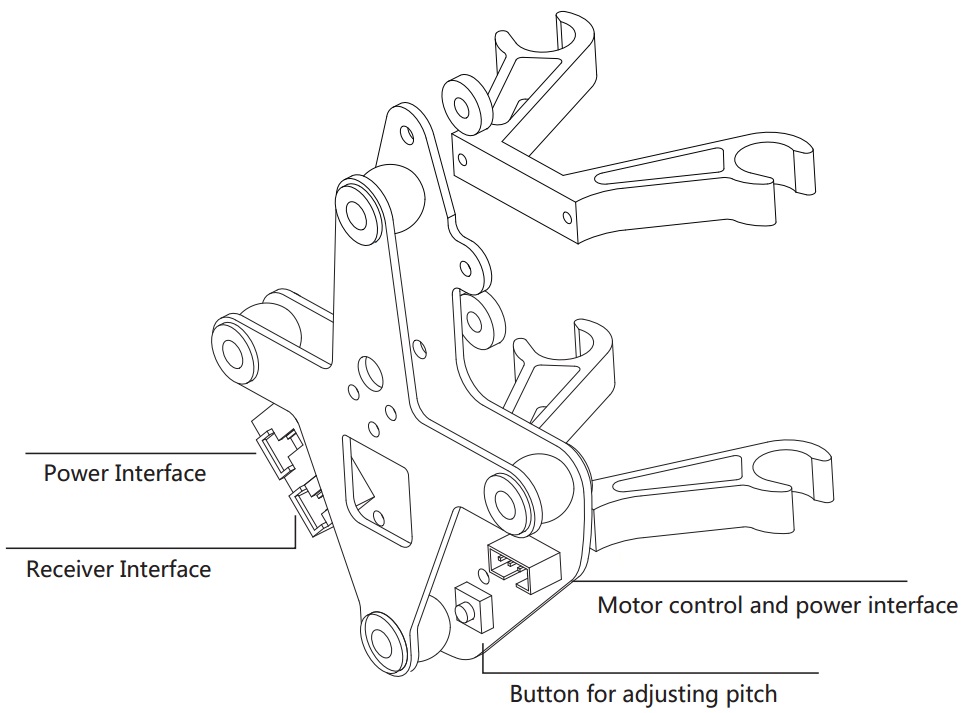
Fy-G3 Assembly (Standard Version)

Picture
Top Plate assembly
Picture
Screws included with the gimbal
If your top plates look different (Phantom compatible plates), then please scroll down to see the phantom version
  • The first step it to build the top mounting plate.
  • First thing to do it to attach the rubber damping balls to connect the two plates
  • You can then attach the load mounts to the plate as shown, these are used to mount them onto your frame.
  • You dont need to use these load mounts if your frame does not support them.  Simply mount the gimbal to your frame using some spacers.
Picture
Main Gimbal Assembly
  • Now you will need to attach the aluminium gimbal parts as shown in the image.  
  • Take care to use some spring washers in the indicated locations.
  • The final step is to attach your gopro 3 camera to the gimbal.
Picture
You can also mount the gimbal vertically if you want
  • You can also mount the G3 brushless gimbal vertically if you want.
  • The image shows you how to assembly the brushless gimbal so that its standing up.

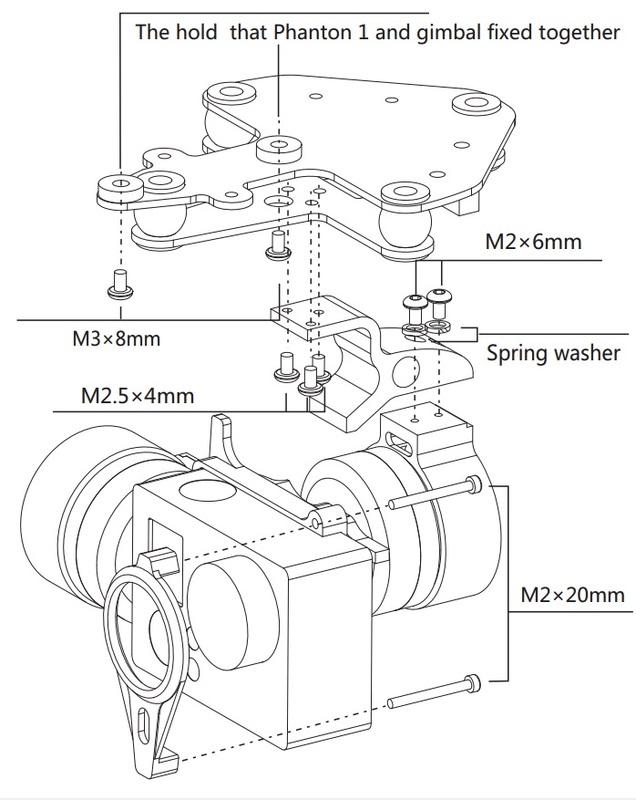
FY-G3 Assembly (phantom Version)

Picture
  • The assembly of the Phantom version is basically the same as the regular version, just that the top plates have a slightly different shape.
Picture
  • If you are not mounting this gimbal to your DJI Phantom frame, you can still mount it to regular multirotor frames by using the load hangards that are included.
  • Attach them to the plate as shown using the M2.5x5 screws.

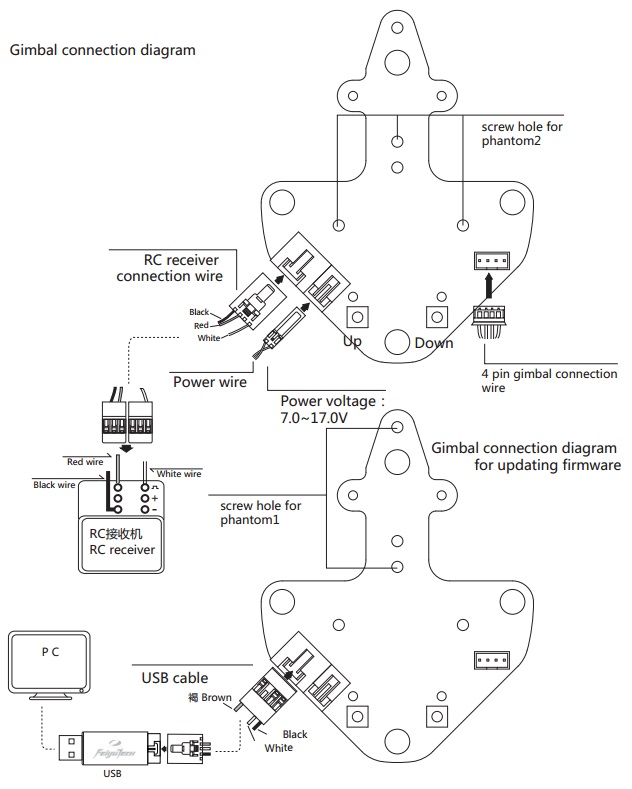
Connecting Everything
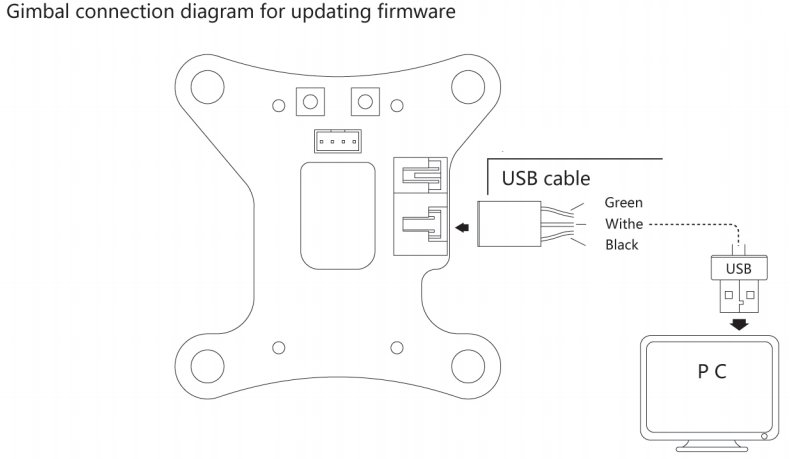
Picture
G3-Gimbal Standard Version
  • Connect the various cables as shown in the image.
  • The 4pin gimbal connector from the motors goes into the white connector next to the pushbuttons.
  • The power and receiver connectors are on the side.
  • You dont have to connect the receiver cables if you dont want to.
G3-Gimbal-Phantom
G3-Gimbal Phantom Version
  • If you are using the Phantom version of the G3-Gimbal, the connection is the same.
  • The connectors are just located in slightly different positions as shown in the image.
  • The 4pin gimbal connector from the motors goes into the white connector next to the pushbuttons.
  • The power and receiver connectors are on the side.
  • You dont have to connect the receiver cables if you dont want to.

Updating Firmware

Picture
  • If you want to update the firmware on your gimbal, this is possible via the USB cable provided
  • Connect the cable to the port on the top plate of the FY G3 gimal, 
  • The USB side of the cable is connected to your computers USB Port.
  • You can find the latest firmware updates here.

Connecting a battery

  • The FY-G3 gimbal comes with connector with loose wires on one end so you can solder whatever battery connector you want.
  • You should use a 2-4S battery to power this gimbal (3S is reccomended)
  • You can either solder the gimbal directly to your multicopter PDB if you want to power the gimbal from the main flight battery.
  • Alternatively you can simply solder a JST connector onto the wire so you can plug it into a small battery (500mah)

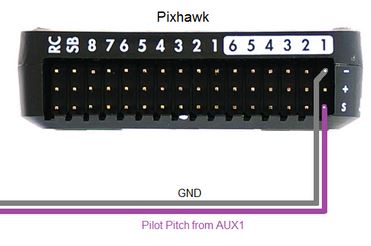
Controlling your FY-G3 Gimbal with APM/Pixhawk

Picture
Pixhawk FY-G3 setup
  • You will need to connect the receiver cable between your FY-G3 gimbal and your APM or Pixhawk output port.
  • Now within the APM mission planner software connect to your autopilot and go to Initial Setup > Optional Hardware > Camera Gimbal.
  • On the Tilt drop down select the corresponding output channel that you connected the FY-G3 cable to your autopilot 
  • In the diagram above, the gimbal is connected to the Pixhawk AUX OUT 1 port which corresponds to RC 9 in the mission planner.
  • Now make sure the Stabilise Tilt button is not checked as the gimbal unit has this functionality built in.
  • Finally you need to select the Input Ch, this is the channel you will use to control the pitch of the gimbal which is usually the rotary knob on your radio transmitter.  In the image above this is set to CH 6.
If you have any questions, or want to share a video please do so on DroneTrest
Comments
comments powered by Disqus

    Categories

    All
    Camera
    ESC
    Flight Controller
    Fpv Gear
    Gimbals
    Gluonpilot
    Multirotor
    Radio Control
    Telemetry

    RSS Feed

    Forums
    Buy Stuff
    Knowledge Base
Picture
Visit our Community Forums if you have any questions
  • Home
  • Shop
  • Students/Researchers
  • About