UNMANNED TECH
  • Home
  • Shop
  • Students/Researchers
  • About
  • Contact
  • Manuals
  • Regulations
  • Multicopter Safety Notes
  • Blog

FiberGlass Brushless Gimbal Assembly Guide

27/5/2013

Comments

 
Picture
This assembly guide will show you how to assembly your 2 axis brushless gimbal that is made using fiberglass.
  • Suggested Motor - 2x BM2208-80
  • Suggested Controller - 2 Axis BL controller
Buy one now

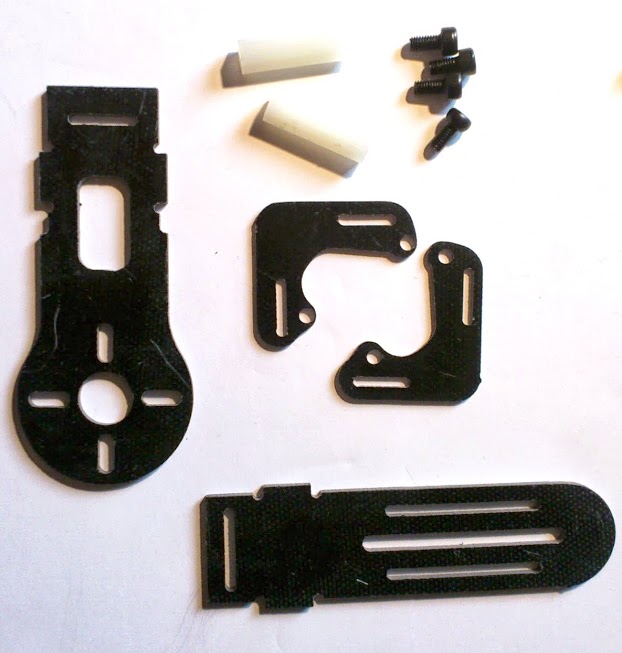
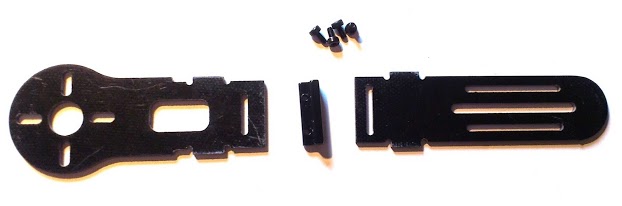
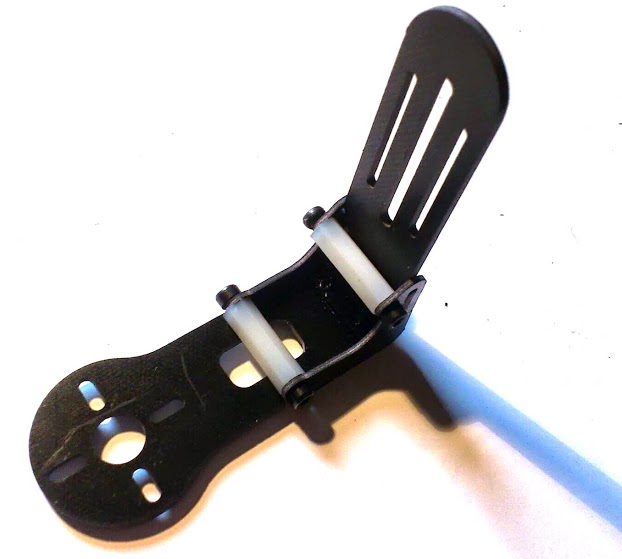
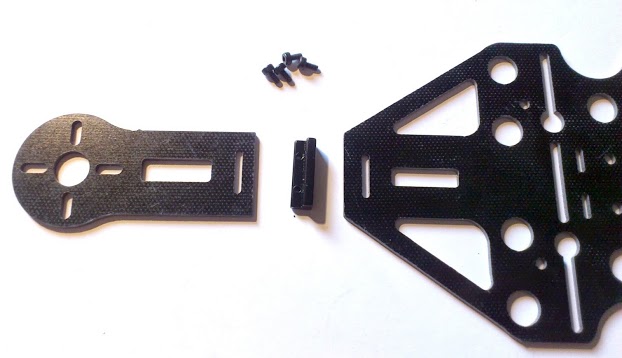
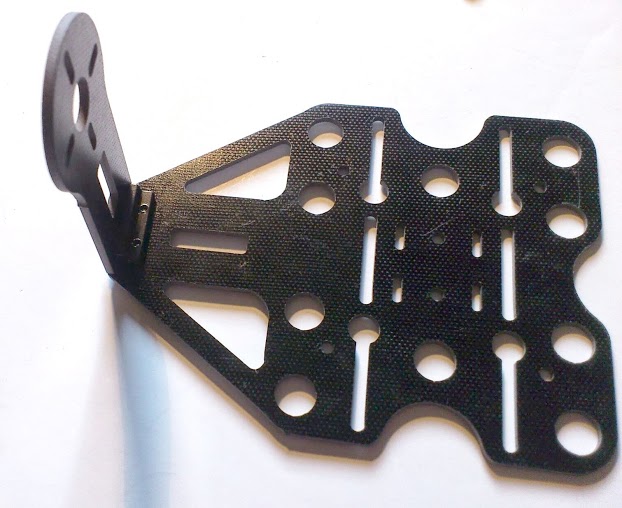
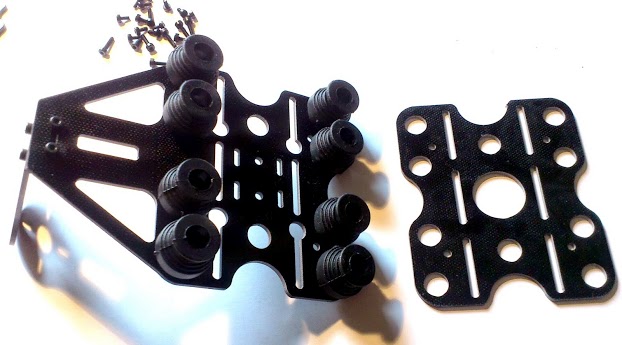
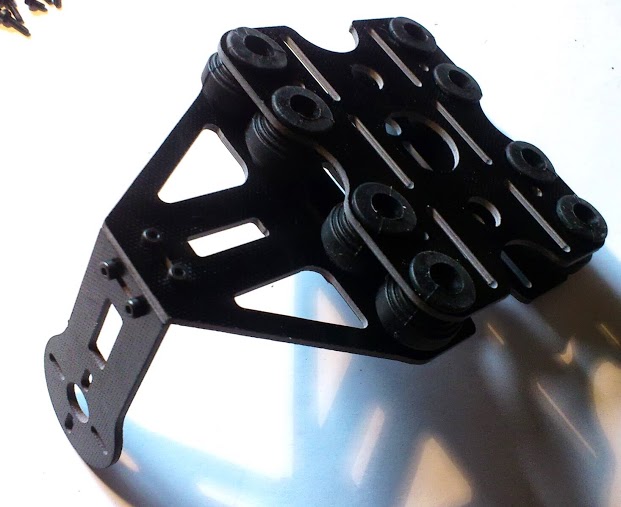
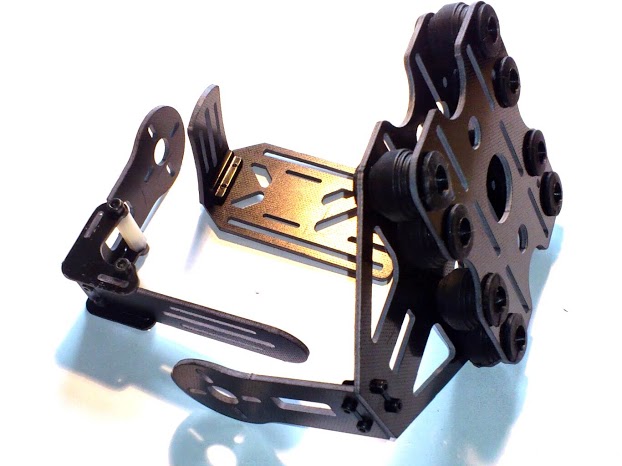
Quick Assembly Image

Picture
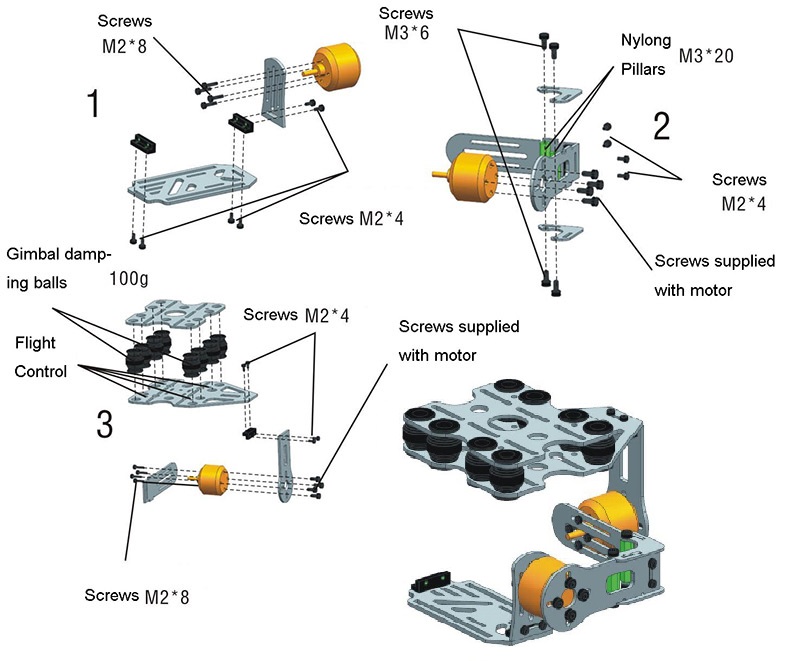
A more detailed guide with steps and photos are included below.

Assebly of the Fiberglass Parts

Picture
  • The parts included with the basic gimbal frame are shown.
  • You should get two bags containing screws and other attachments.
  • 8 Rubber vibration damper balls are also included.
Picture
  • The first thing you need to do it to build the camera mounting plate.
  • Take the parts as shown in the image, including a aluminium L bracket and 4 small screws.
  • You will need to mount the two fiberglass pieces of the brushless gimbal as shown
Make sure to mount the two plates together in the correct orientation as shown in the image.
  • The 4 screws go on either side of the L bracket
Picture
  • Now you will need to take the pieces as shown in the image to build the next part of the gimbal.
  • The 4 screws used to attach to the nylon pillars are the largest screws included in the kit.
Picture
  • You will need to use another aluminum L bracket to attack the two fiberglass pieces of the roll axis together.
Picture
  • Just like before, you will first mount the L bracket to one of the pieces and then attach the second fiberglass piece and secure it with the screws.
  • For the best performance of your gimbal you must try to make sure this bracke it in the middle of each fiberglass piece.
As both Fiberglass pieces are symmetrical  it does not matter which way you mount them.
Picture
  • Now you need to simply mount the nylon pillars onto the fiberglass L shaped plate as shown.
Picture
  • Now you need to secure the two pieces further by placing the L shaped fiberglass pieces across the two roll axis pieces.
  • To ensure a tight lock you may need to use some pliers or force to ensure the L pieces are secured properly to the roll axis fiberglass pieces, this will ensure a very strong connection with no wobble.
Picture
  • Now you will need to start to assembly the final part of the gimbal using the pieces as shown in this image.
Picture
  • You will need to mount the two parts using the aluminium L bracket as you did in previous steps.
Picture
  • Now you will need to attach the rubber vibration dampers 
  • You will start my attaching 8 of them to one of the plates
Picture
  • You will not need to attach the top plate to the vibration damper balls.
Picture
  • Now that you have assembled all of the fiberglass parts of your gimbal, the next steps are to attach your brushless gimbal motors, and controller.
Comments
comments powered by Disqus

    Categories

    All
    Camera
    ESC
    Flight Controller
    Fpv Gear
    Gimbals
    Gluonpilot
    Multirotor
    Radio Control
    Telemetry

    RSS Feed

    Forums
    Buy Stuff
    Knowledge Base
Picture
Visit our Community Forums if you have any questions
  • Home
  • Shop
  • Students/Researchers
  • About
  • Contact
  • Manuals
  • Regulations
  • Multicopter Safety Notes
  • Blog